Learn how to use the various kinds of events to initiate your PopFlows. We'll cover the basic types of events, and how they open up possibilities for you to build workflows to boost your productivity.
For a PopFlow to execute, it must have the following requirements:
- The PopFlow must be published.
- The PopFlow is assigned to an Event.
PopFlow is published to groups or profiles within the CRM. These groups/profiles are bound to users who access the CRM and are specific to the type of CRM you use. As an example, Oracle CRM will label the terminology as “profiles” whereas Zendesk will label as “groups”.
Breaking it down
- As an example, Jane Doe might be part of “Promotion Deals” as well as “Retention Agents”.
- We can have a PopFlow execute based on any user who is set to the group/profile of “Promotion Deals”.
To accomplish this, we publish the PopFlow in question to the group/profile for “Promotion Deals”.
✅ Profiles
And to add further flexibility, we need “trigger” the PopFlow to execute on an Event. For example, only when the users of the profile “Promotion Deals” answer an incoming voice call. In this case that would be labeled as the "On Answer" event under Telephony.
✅ Events
PopFlows can be published to multiple profiles/groups. However, that same PopFlow can only be loaded to a single “Event”. There are workarounds to this; we'll explain later. However, for the sake of the example above, we can also publish the PopFlow to “Retention Agents”.
Recapping, A PopFlow Can Be:
✅ Published one or more profiles
⚠️ Published to a single Event
⚠️ Multiple PopFlows assigned profiles can execute across the same event type.
Execution Logic
For this example, we'll have two separate PopFlows named:
- PopFlow One
- PopFlow Two
Both will be assigned to the profile/group “Promotion Deals” and loaded on the Telephony Event “On Answer”.
Based on the above example, Both PopFlows will execute when:
- a CRM user is assigned to “Promotional Deals”
- the user Answers the voice call.
ℹ️ Both PopFlows will execute at the same time! Because of this, we need to be mindful of what activities are performed in these PopFlows. We could also leverage calling another PopFlow within a PopFlow.
To do this, we might want to leverage the Custom event and move one of our PopFlows under it. Example:
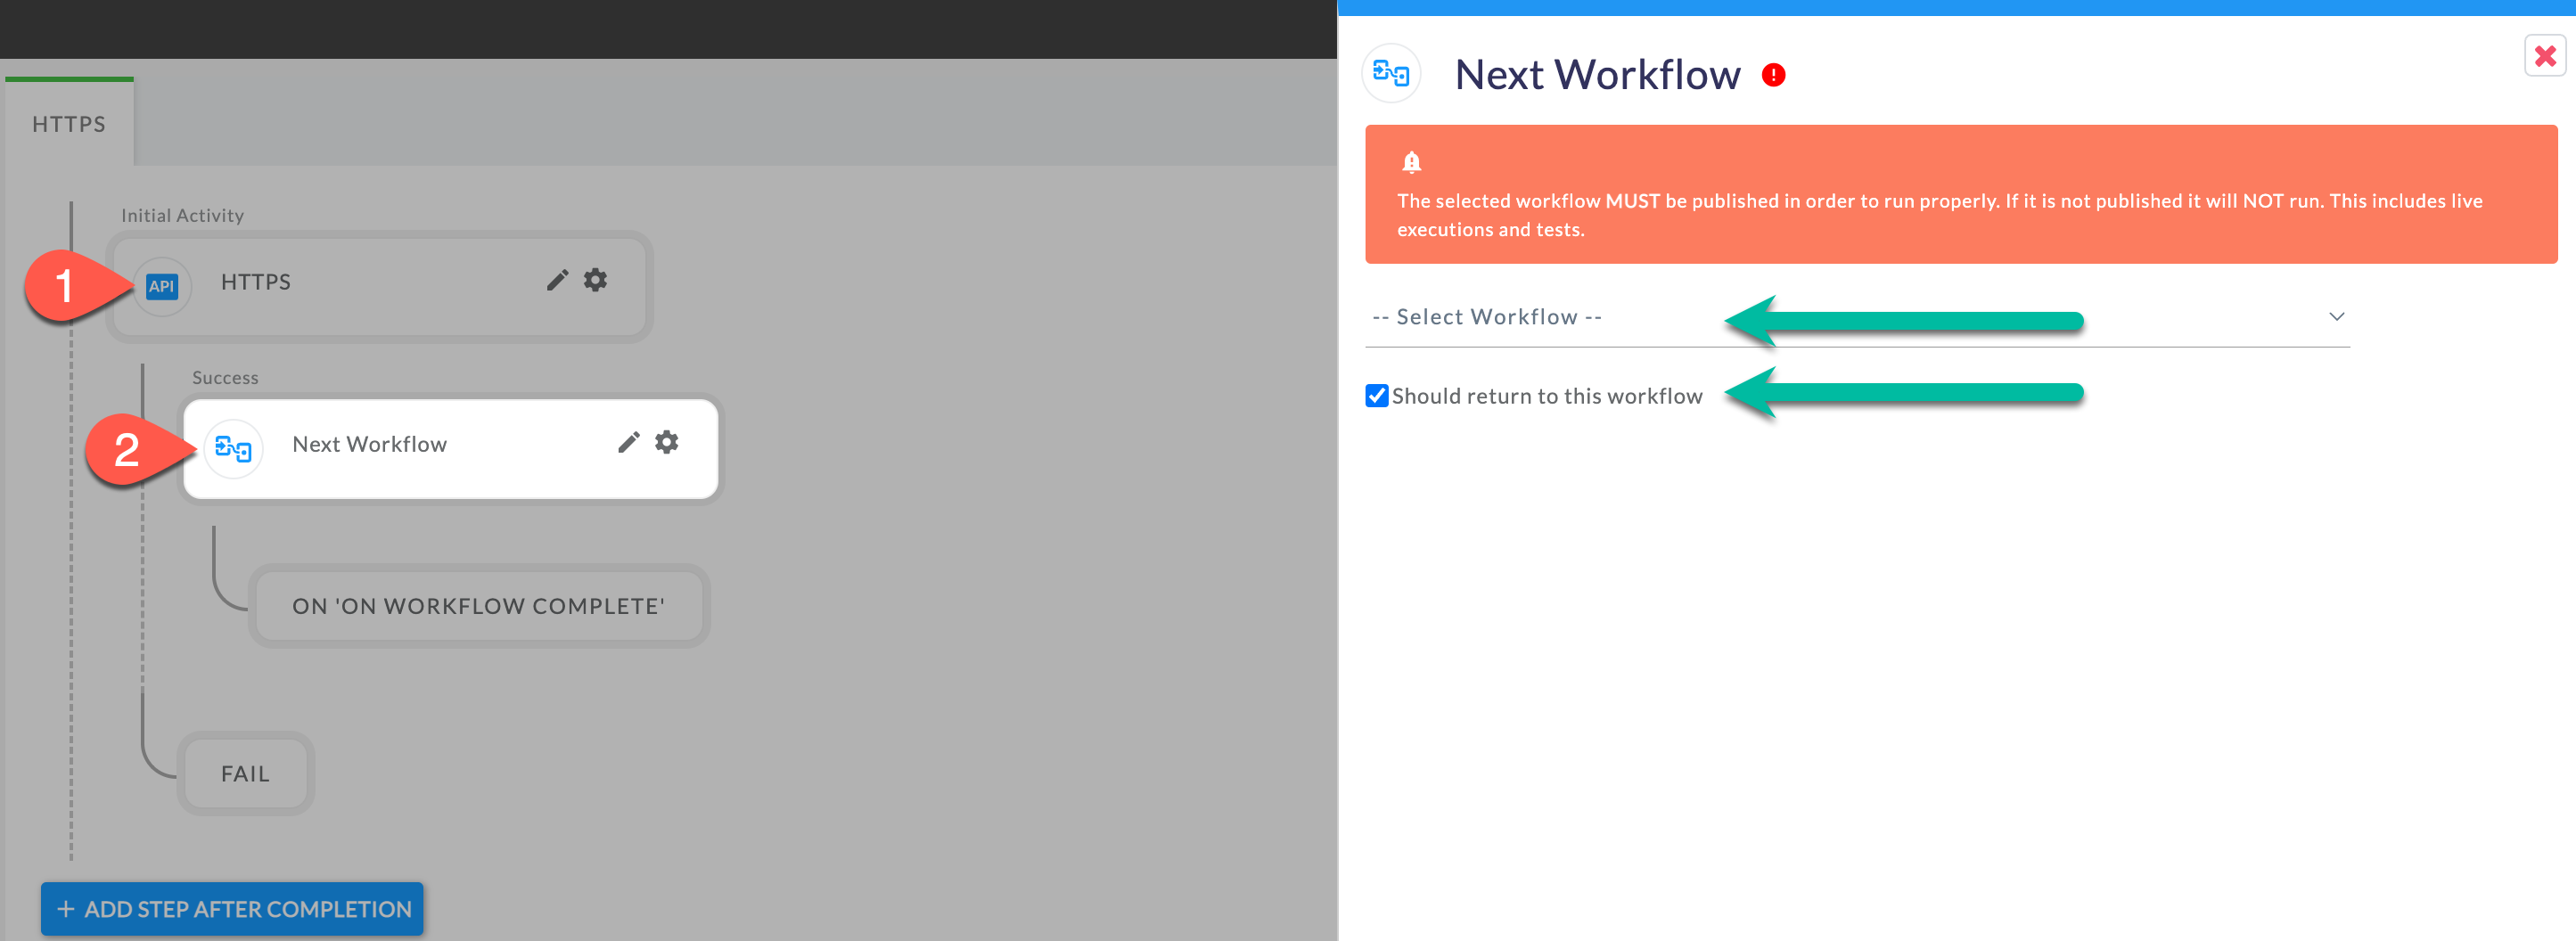
- PopFlow one performs its required activity
- The last activity calls PopFlow Two (from within the PopFlow)
- Note the options for returning back to the workflow.
Events aka Triggers
Events are the triggers used for executing a published Workflow.
ℹ️ Events are also used for filtering and sorting options from the PopFlow Workflow Page.

Event Types:
Events are grouped by an “Event” type. There are 4 main Event Types/Groups.
Telephony
ℹ️ Telephone events require the use of OpenMethods Harmony Integration (TL;DR: An integration between OpenMethods and your ACD)
-
On Ring
- After the call starts ringing.
-
On Answer
- After the call is answered.
-
On Hold
- After each time the call is placed on hold.
-
On End
- After the call is ended.
- If disposition is enabled, it will trigger after the disposition is completed instead.
- After the call is ended.
Chat
-
On Ring
- After a pending chat has been received.
-
On Accept
- After a chat has been accepted.
-
On Reject
- After a chat has been rejected.
-
On Chat End
- After a chat has been concluded.
- If disposition is enabled, it will trigger after the disposition is completed instead.
- After a chat has been concluded.
-
Email Ring
- After a pending email has been received.
-
Email Accept
- After an email has been accepted.
-
Email Reject
- After an email has been rejected.
-
Email Close
- After an email has been completed.
- If disposition is enabled, it will trigger after the disposition is completed instead.
- After an email has been completed.
Custom events
Custom events are used to trigger an Interaction Workflow outside of the scope of the "Out of the box" events. Custom events can be triggered via OM Connect or OSvC BUI extensions.
Custom Event scope
Please note that Custom Events are available to all instances under your Customer Account.
For example, assume you are Customer A with CRM instance X and CRM instance Y. If you create new custom event called “My Custom Event”, the newly added event will be available for BOTH CRM instance X and Y.
Examples:
- Trigger by OM Connect API
- Button Click within CRM
- Workspace Type/View
- And several more! There is a lot of flexibility!
Adding a custom event
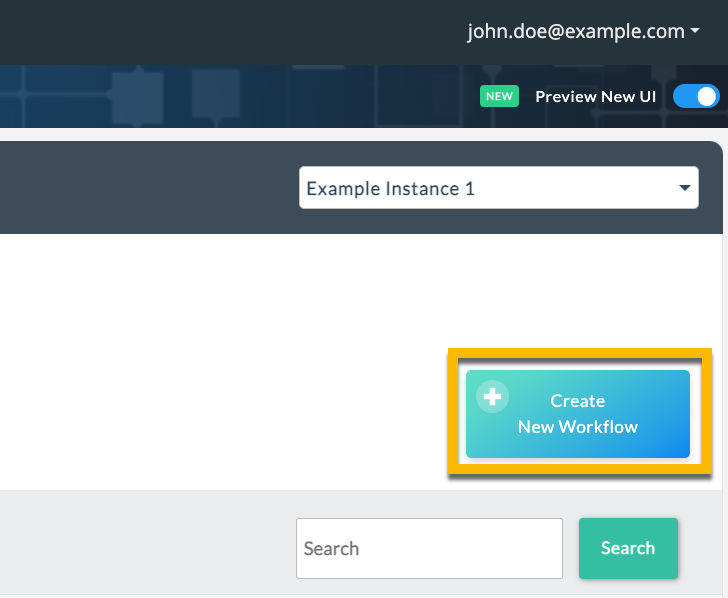
To add a Custom Event click “Create New Workflow”
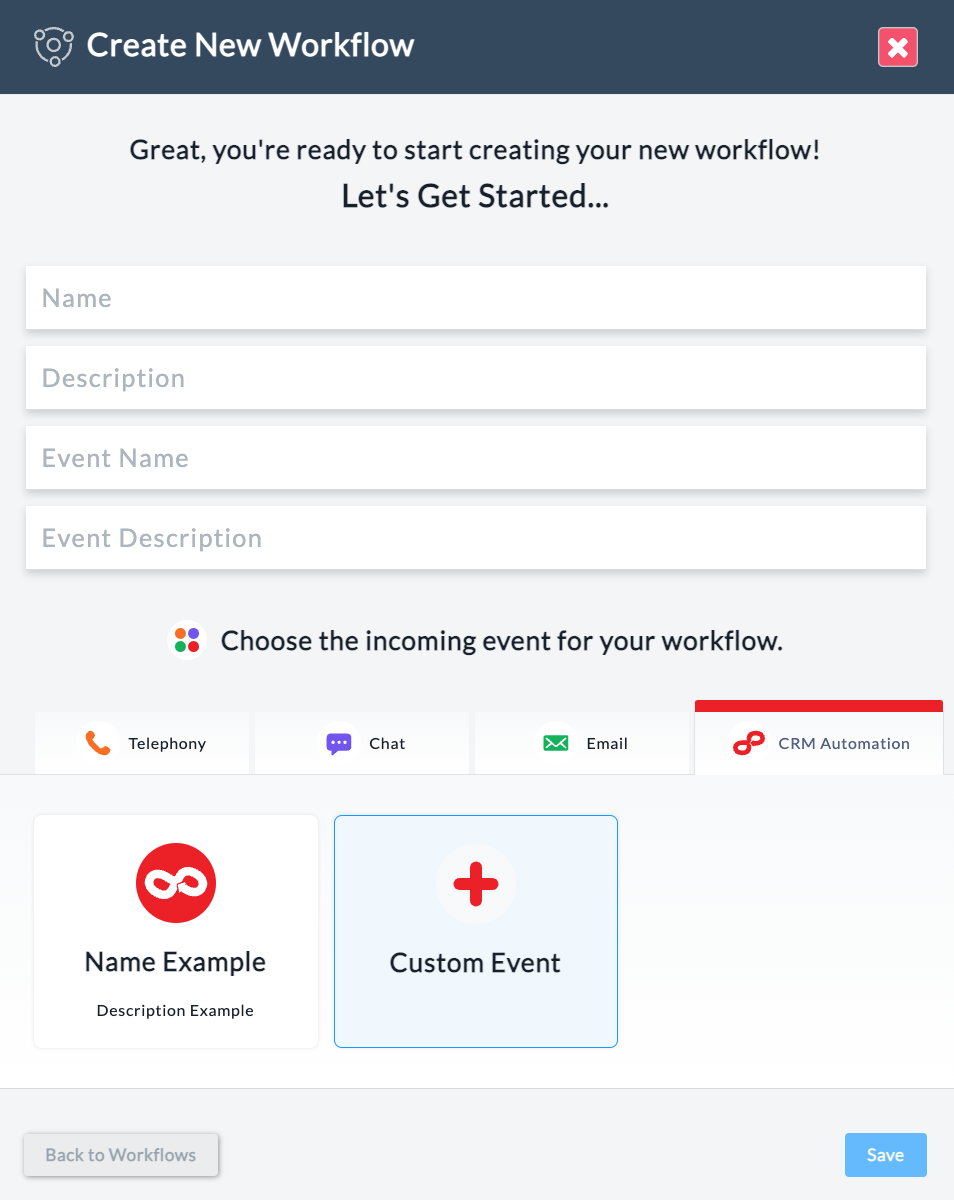
A Modal will appear:
- Select the CRM Automation tab.
- Click Custom Event
- Name (names the event tile such as “Name Example”)
- Description (a note appearing under Tile Name)
- Event Name: Used when triggering the Custom event.
- Event Description: A note to yourself to remind you or other users the purpose of the Custom Event.
- Save