Overview
The 'Pop Search and Select' activity allows you to show the results grid in a custom popup inside Oracle Service Cloud and perform search & select operations. In the PopFlow Studio, you can configure the 'Pop Search and Select' activity.
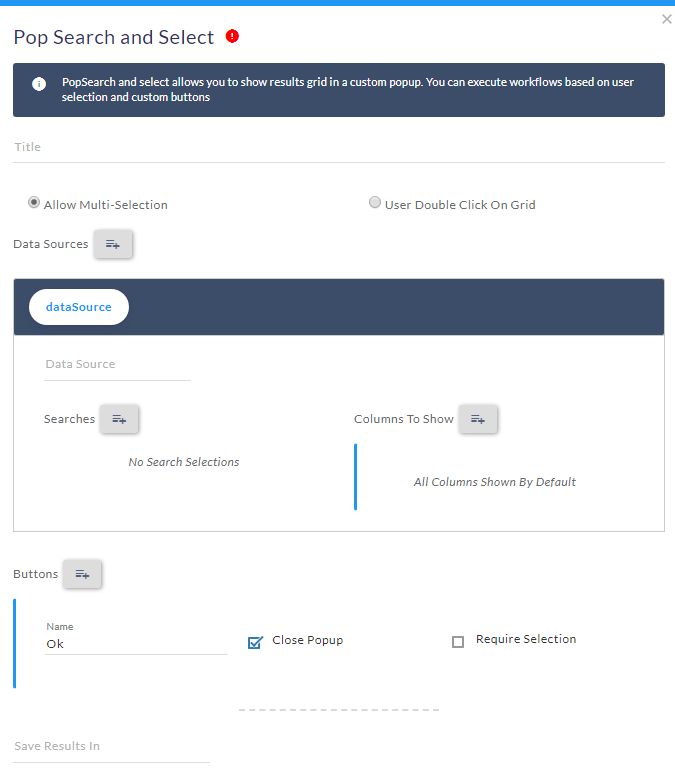
After opening 'Pop Search and select' activity, you will get the below configuration panel.
Pop Search and Select Configuration Panel
 |
Default Configuration Parameters:
|
|
Add Button Allows you to add buttons to the popup. When the button is clicked, the activities defined in the button definition will be executed. |
Add Searches allows you to add searches to the popup. When the search type is selected, and the search button is clicked the activities defined in the search selection definition will be executed. |
How It Works
A Simple Example to configure the 'Pop Search and Select V2' activity in PopFlow Studio.
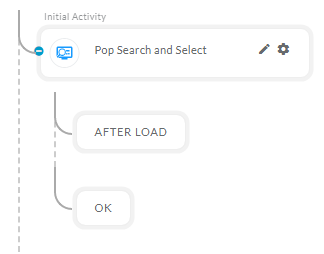
- Select the 'Pop Search and select' activity from 'Activity Sidebar'.
- Click on 'Pop Search and select' activity to open and configure the 'Pop Search and select' activity.
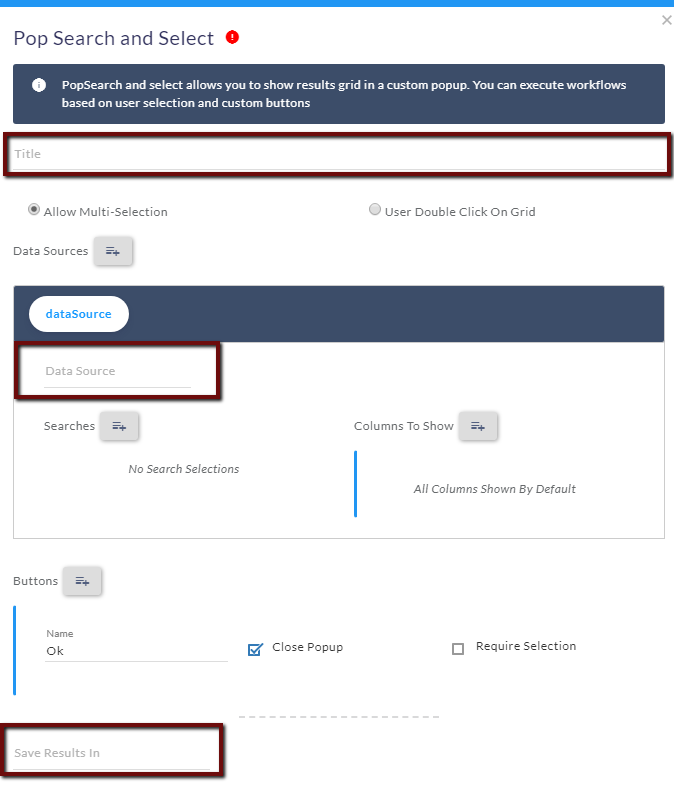
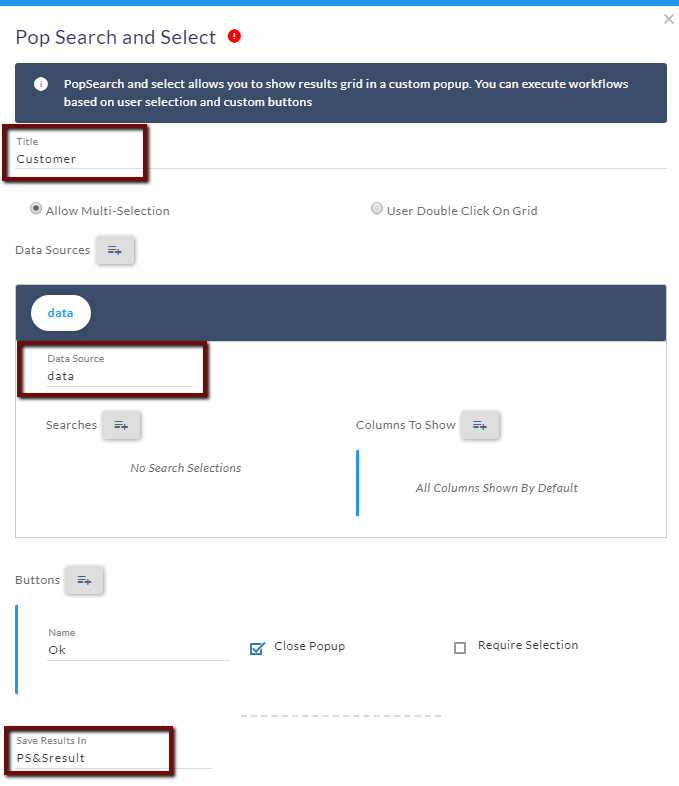
- Once the Activity is opened now fill the Defaults required fields i.e. 'Title', 'Data Source' and 'Save Results In'.
Required Defaults
 |
|
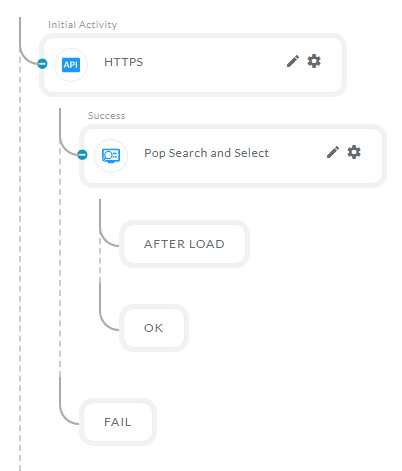
On 'SUCCESS'
 |
|
Update Default Required Fields
 |
|
Data Sources
- You can add the multiple 'Data Source' to view the different data lists and also you can choose which column you want to show for selected 'Data Source'.
- After selecting the 'Data Source'. You can add multiple 'Search' by clicking on the 'Searches' button for every 'Data Source'.
Searches
 |
|
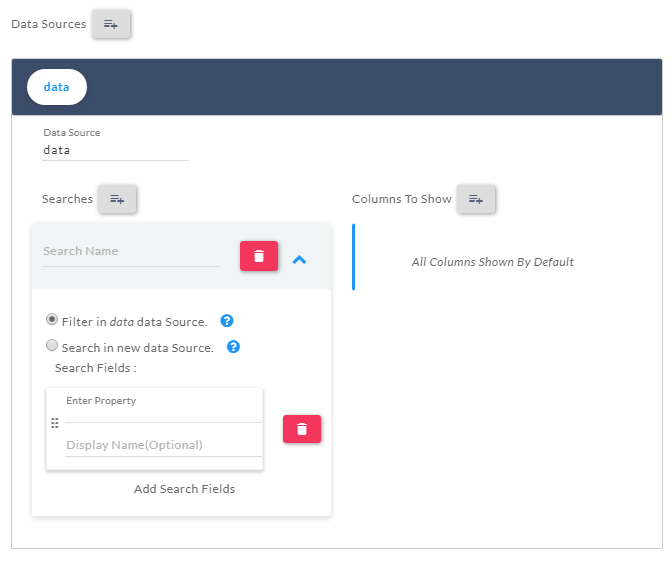
- Enter the search name inside the 'Search Name' field.
- Select the search type "Filter in data Data Source" if you want the search result faster. This will search in selected 'Data Source'.
- Select the search type "Search in new Data Source".This will make a search in the 'Database' if some new value is updated then it will also get the updated value. To achieve this search you need to add the same activity with the same configuration on the Search Button whose 'Data Source' you are using for the search.
For example, suppose you are using the 'HTTPS' activity 'Save Result In' variable inside the 'Pop Search and Select' activity as a Data Source.

Steps to configure the "Search in new data Source"
Step 1
Select the 'HTTPS' activity 'Save Result In' variable from the options as Data Source inside the 'Pop Search and Select' as shown below.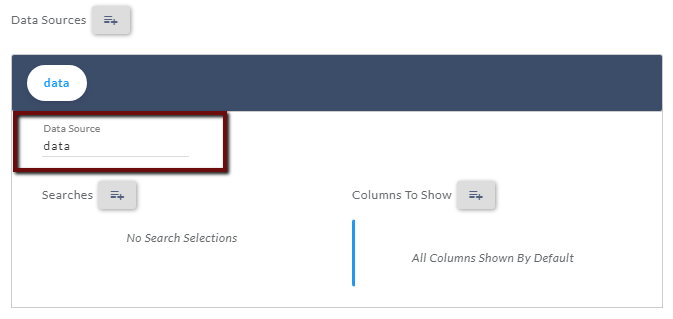
Delete
Step 2
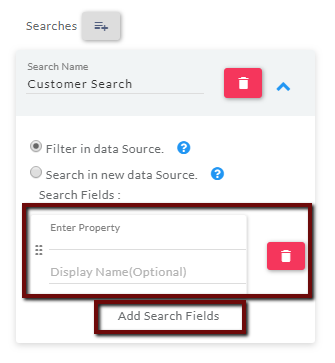
Now create the search for the selected Data Source by clicking on the 'Searches' button. Select the "Search in new data Source" option to achieve the server-side searching.
DeleteStep 3
Enter the custom 'Search Name' or the 'Property' values (search property) inside the 'Enter Property' fields.

Step 4
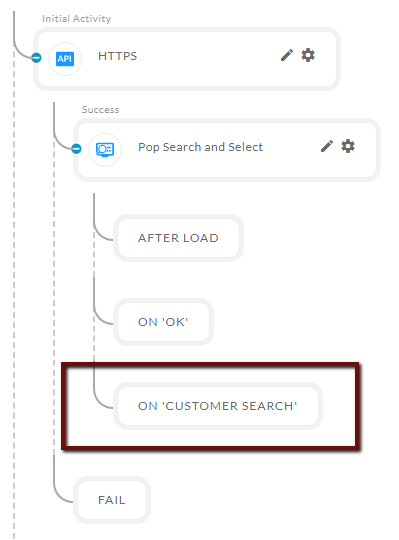 |
After creating the search you will notice there is a button created with the same name as 'Search Name' (For this example 'Customer Search' is the 'Search Name') on the designer page under the 'Pop Search and Select' activity. |
Step 5
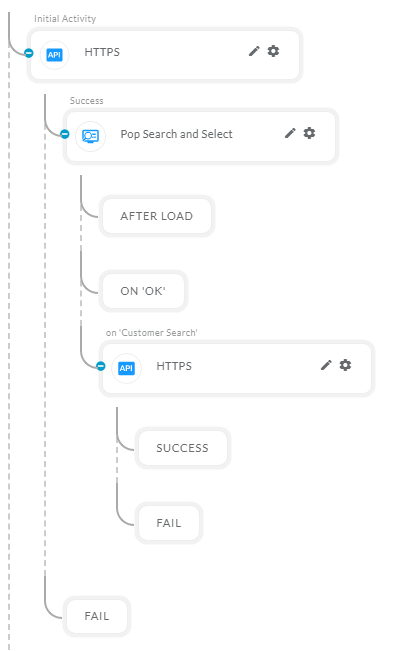 |
Now add the 'HTTPS' activity on the 'CUSTOMER SEARCH' button to achieve the server-side searching. The 'HTTPS' activity should have the same configuration as whose 'Save Result In' variable is selected as a 'Data Source' for the 'CUSTOMER SEARCH' Search inside the 'Pop Search and Select'. |
Delete
Step 6
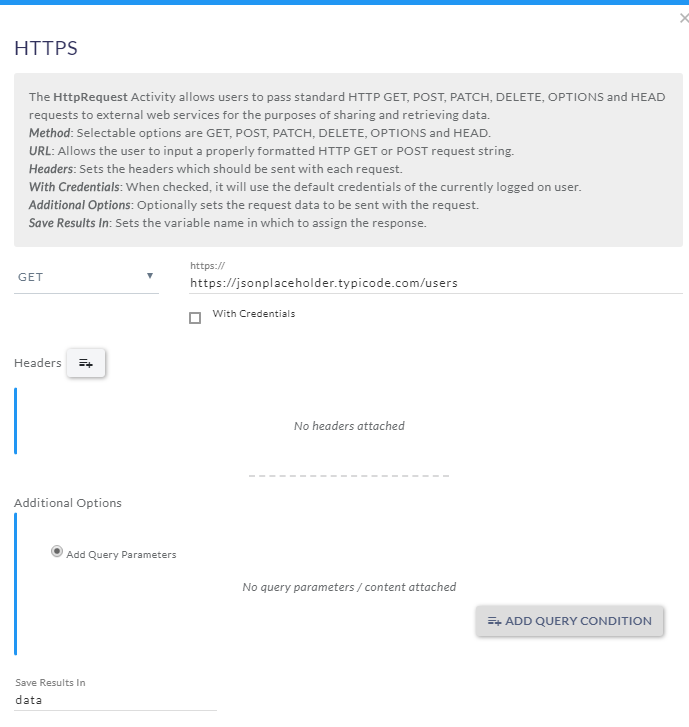
'Save Results In' variable name of 'HTTPS' activity should be the same as Parent HTTP activity.
Step 7
|
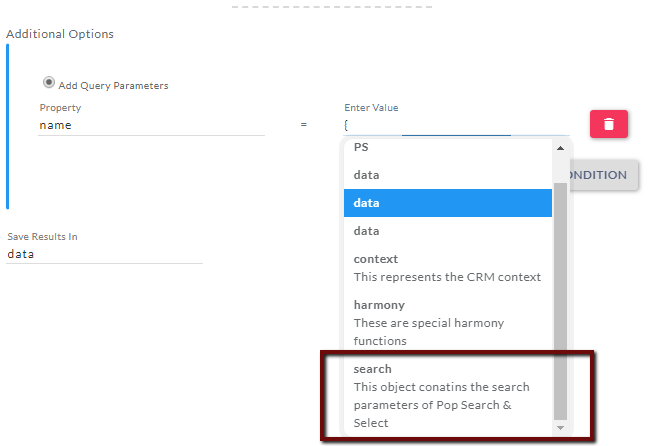
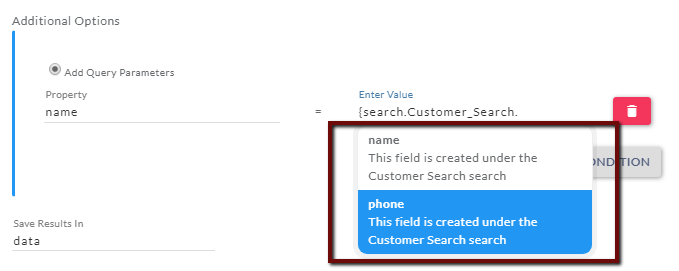
Click on the 'ADD QUERY CONDITION' to add the query parameters. After creating the query parameter you will get the two fields 'Property' and 'Enter Value'. In the Property field provide the correct 'column name' on which you want to apply the search and in 'Enter Value' enter a curly bracket' (" { ") to open the autocomplete list. Once the list is opened select the 'Search' option as shown below. Note: You can add the values manually if the search option is not showing in the autocomplete list. ex- {search.customer_search.name}
|
Step 8
Select the correct search name from the list and again enter a dot (" . ") to open the search fields options created inside the search name as shown below.

Step 9
Select the correct search name from the list and again enter a dot (" . ") to open the search fields options created inside the search name as shown below.
Step 10
|
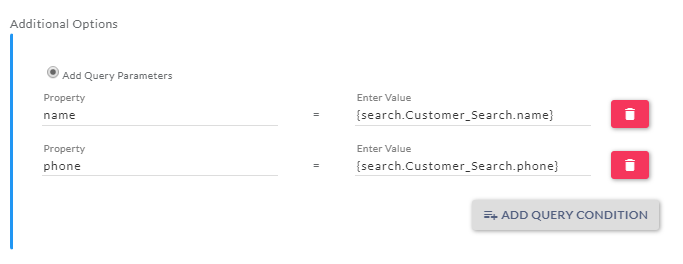
Select the correct search field name for the 'Property'. After selecting the search field enter a 'Closing curly bracket' (" } "). You can add multiple query options according to your searches. |
|
|
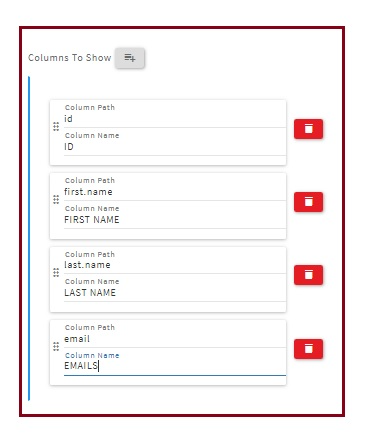
Columns To Show
Display & Define Columns
|
You can display all the columns of the Data Source or You can define the columns that will be displayed in the search grid. To define the columns click on:
|
Adding Buttons:
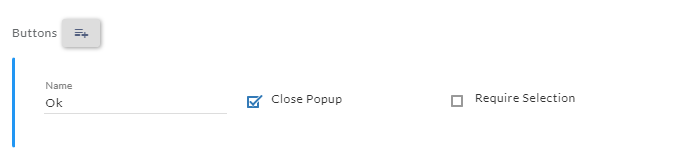
To add the Custom button you need to click on the 'Button' icon to create the buttons.
After clicking on the button, you will see a field name as 'Name' and two checkbox name as 'Close Popup' and 'Require Selection'.
Enter the Button name inside the field and click on the checkbox if you want to close the pop-up after clicking on the button in the Oracle service cloud. You can also set a condition on the button if this button required an item to be selected from the grid then you can select the 'Require Selection' option.
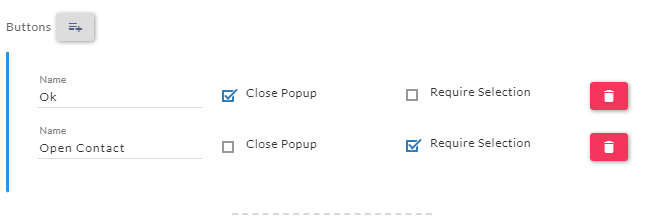
You can create multiple buttons. Once the buttons are created you will notice on the designer page has changed under the 'Pop Search and Select' same button is created which you created inside the 'Pop Search and Select' activity. You can add multiple activities on that button to perform several tasks on a button click.
Required Selection
- The 'Required Selection' option will give you the feature to disable a button if a button requires an item to be selected from the 'Pop Search and Select' Grid in the Mediabar.
- Select the 'Require Selection' option as shown below if you want to force a user to select the data.
Reviewing Your New Search
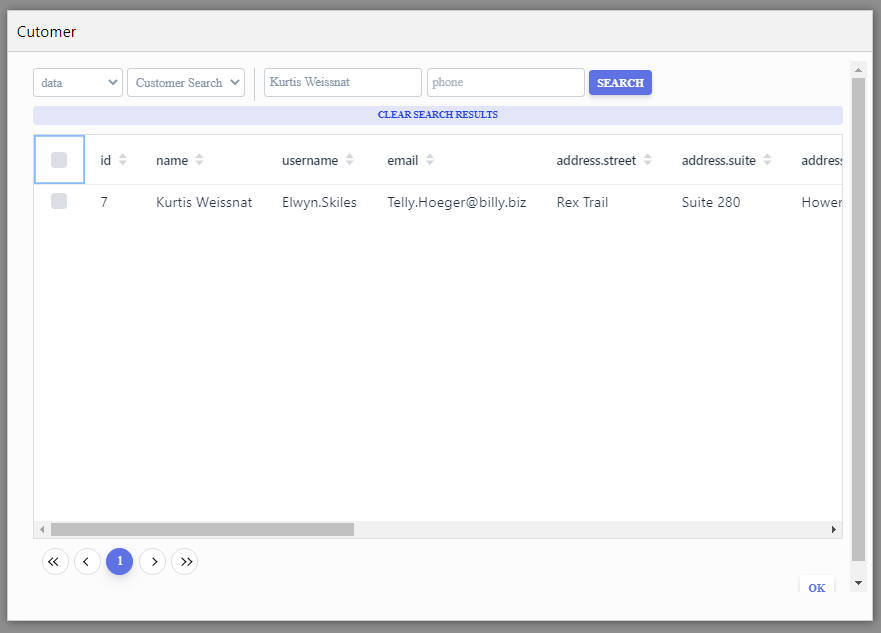
After executing the workflow below pop-up will be shown in the Oracle service cloud.
- After executing the workflow it will pop up a 'Pop Search and Select' screen with the result, Searches and Custom buttons as shown below.
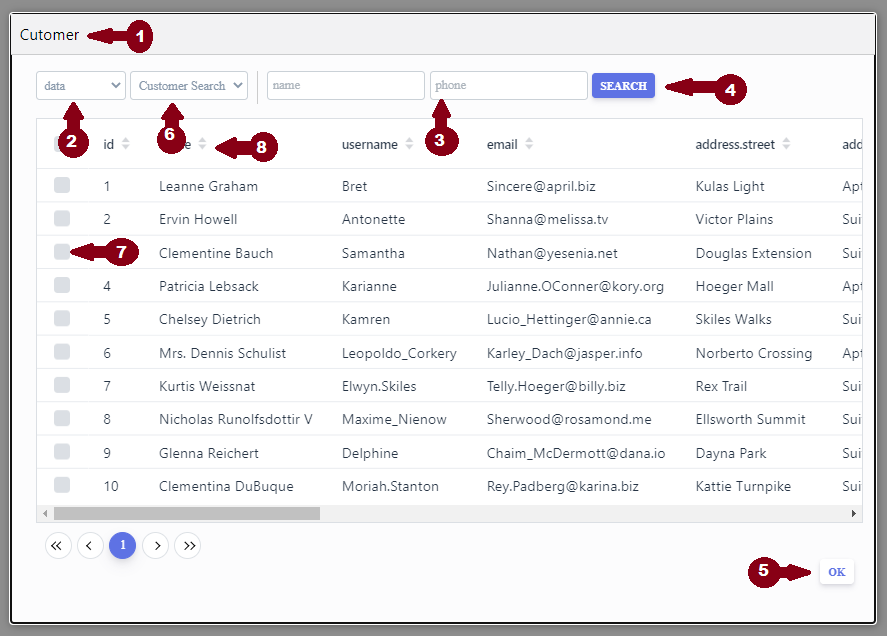
- The title of the popup.
- The Data Sources which we selected while configuring the 'Pop Search and Select'.
- The search field: Enter the correct value and make a search.
- The search button:
a. The activities in the definition (i.e. HTTPS in this example) will be executed when the search button is clicked. - Multiple buttons can be configured. When the button is clicked then the activities define for that button will be executed.
- The Searches which we created while configuring the 'Pop Search and Select'.
- You can select multiple rows by clicking on the checkbox.
- The Column Name of the Popup.
Result After the Search.
You can search by 'name' or 'name' and 'phone'.