After Call Work (Post Contact)
(ACW) After Call Work State
(ACW) After Call Work State feature allows agents to enter ACW manually.
How the call state flow works:
- Call Connects to Agent
- If an agent wants to enter "manual" ACW (to extend ACW Time) - The agent must place the state into "After Call Work (ACW)" before the call ends.
- The agent will select "After Call Work (ACW)"
- Selecting "After Call Work (ACW)" prepares the next agent state (ACW).
-
When Automatic ACW is enabled in NICE, the call will enter ACW automatically.
- Once the ACW countdown completes, the call is moved back into "After Call Work (ACW)" state.
- When Automatic ACW is not enabled in NICE, the call moves into ACW state.
-
When Automatic ACW is enabled in NICE, the call will enter ACW automatically.
- The agent will remain in "After Call Work (ACW)" until they manually move to another state.
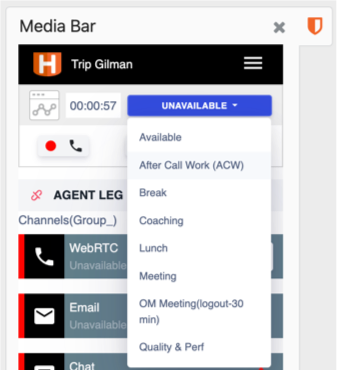 |
Here’s what the Agent sees when selecting a reason code.
|
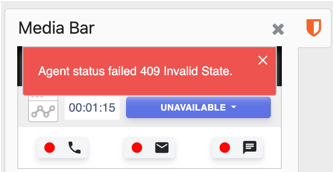 Error displayed when attempting to enter ACW while not on an active call. |
Since ACW reason codes can only be selected when on an active call, the agent will receive this error message if they attempt to go into ACW without one. |
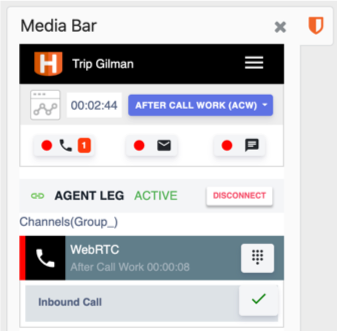 |
|
Caveats
-
If automatic wrap-up is enabled within NICE:
- the agent must enter the ACW state before the call ends to ensure Automatic Wrap-up does not place the agent into a ready state post Max Time Limit.
- The manual state does not "extend" the Max Time Limit within NICE. Instead, it places the agent into ACW until they move the the status manually.
- For more information on Post-Contact Work within inContact, please visit here.
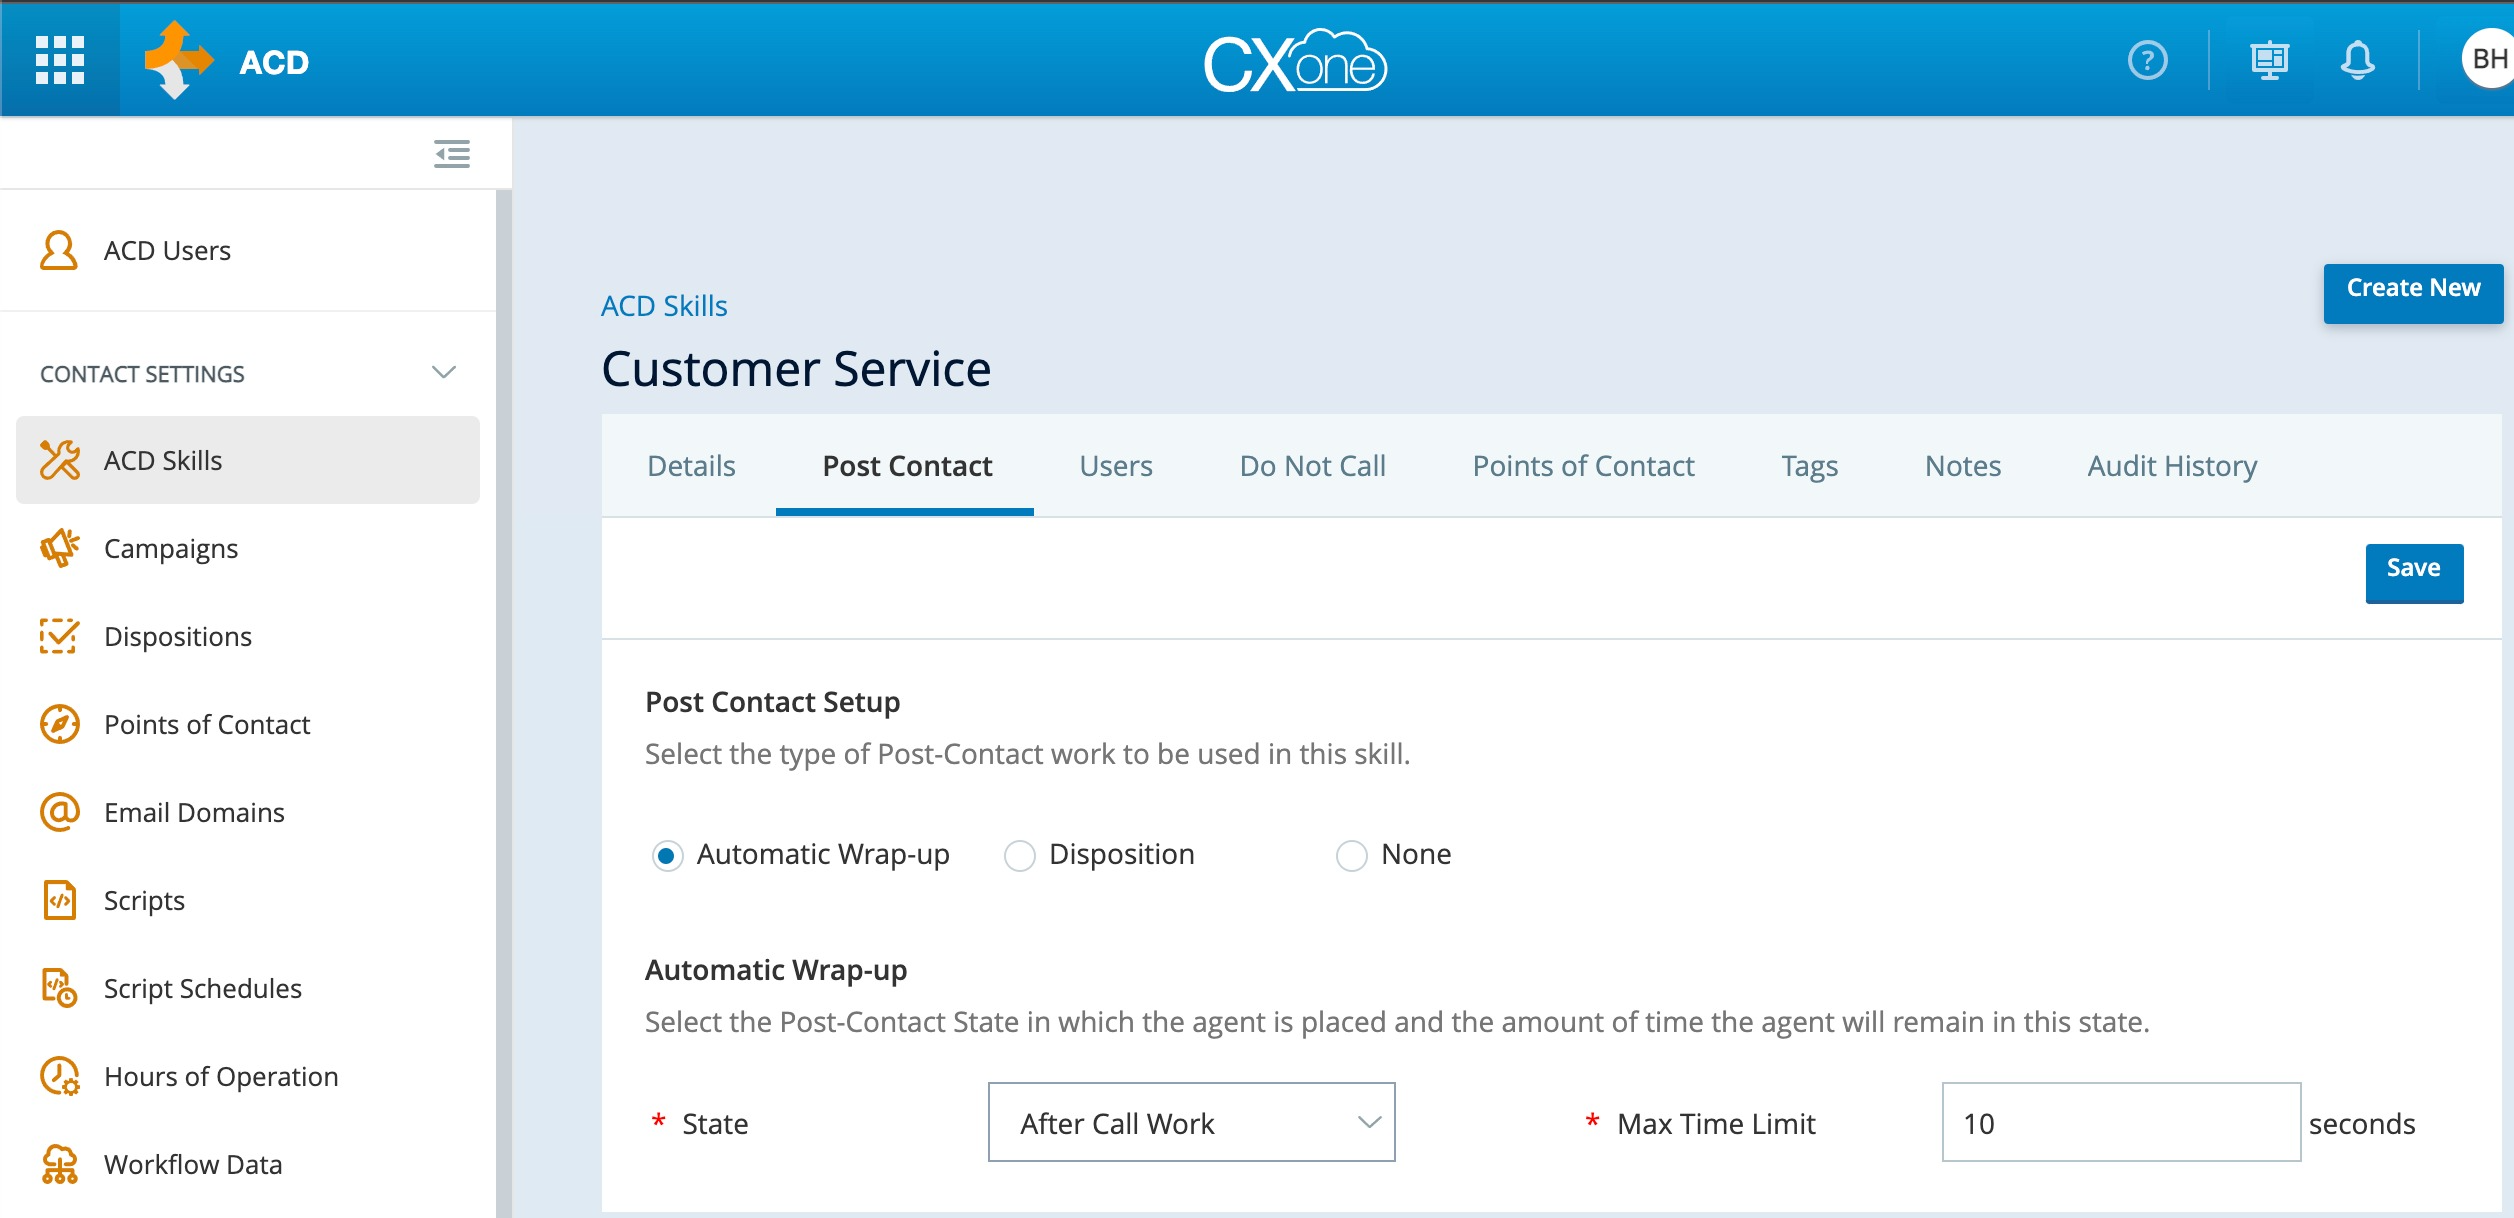
Automatic Wrap-up
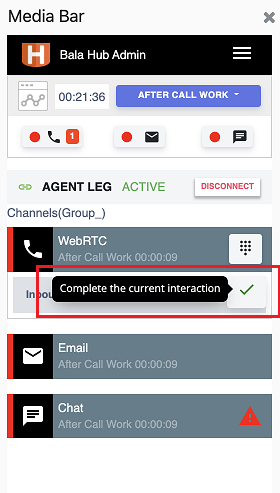 Green checkmark Completed Interaction button
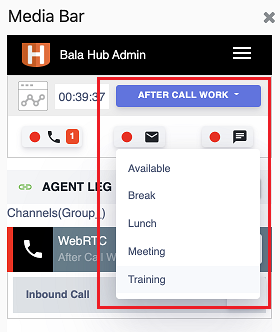 Agent Status dropdown opened.
After the call is released ( hung up by either agent or caller), A green checkmark button will be shown. - By clicking the button, the status dropdown box will be opened, the agent can choose Available or any Not Ready reason. This will terminate the ACW max time limit and the agent will be put into the selected status immediately.
- If the agent does not select any status, agent status will be changed to Available at the end of the ACW max time limit.
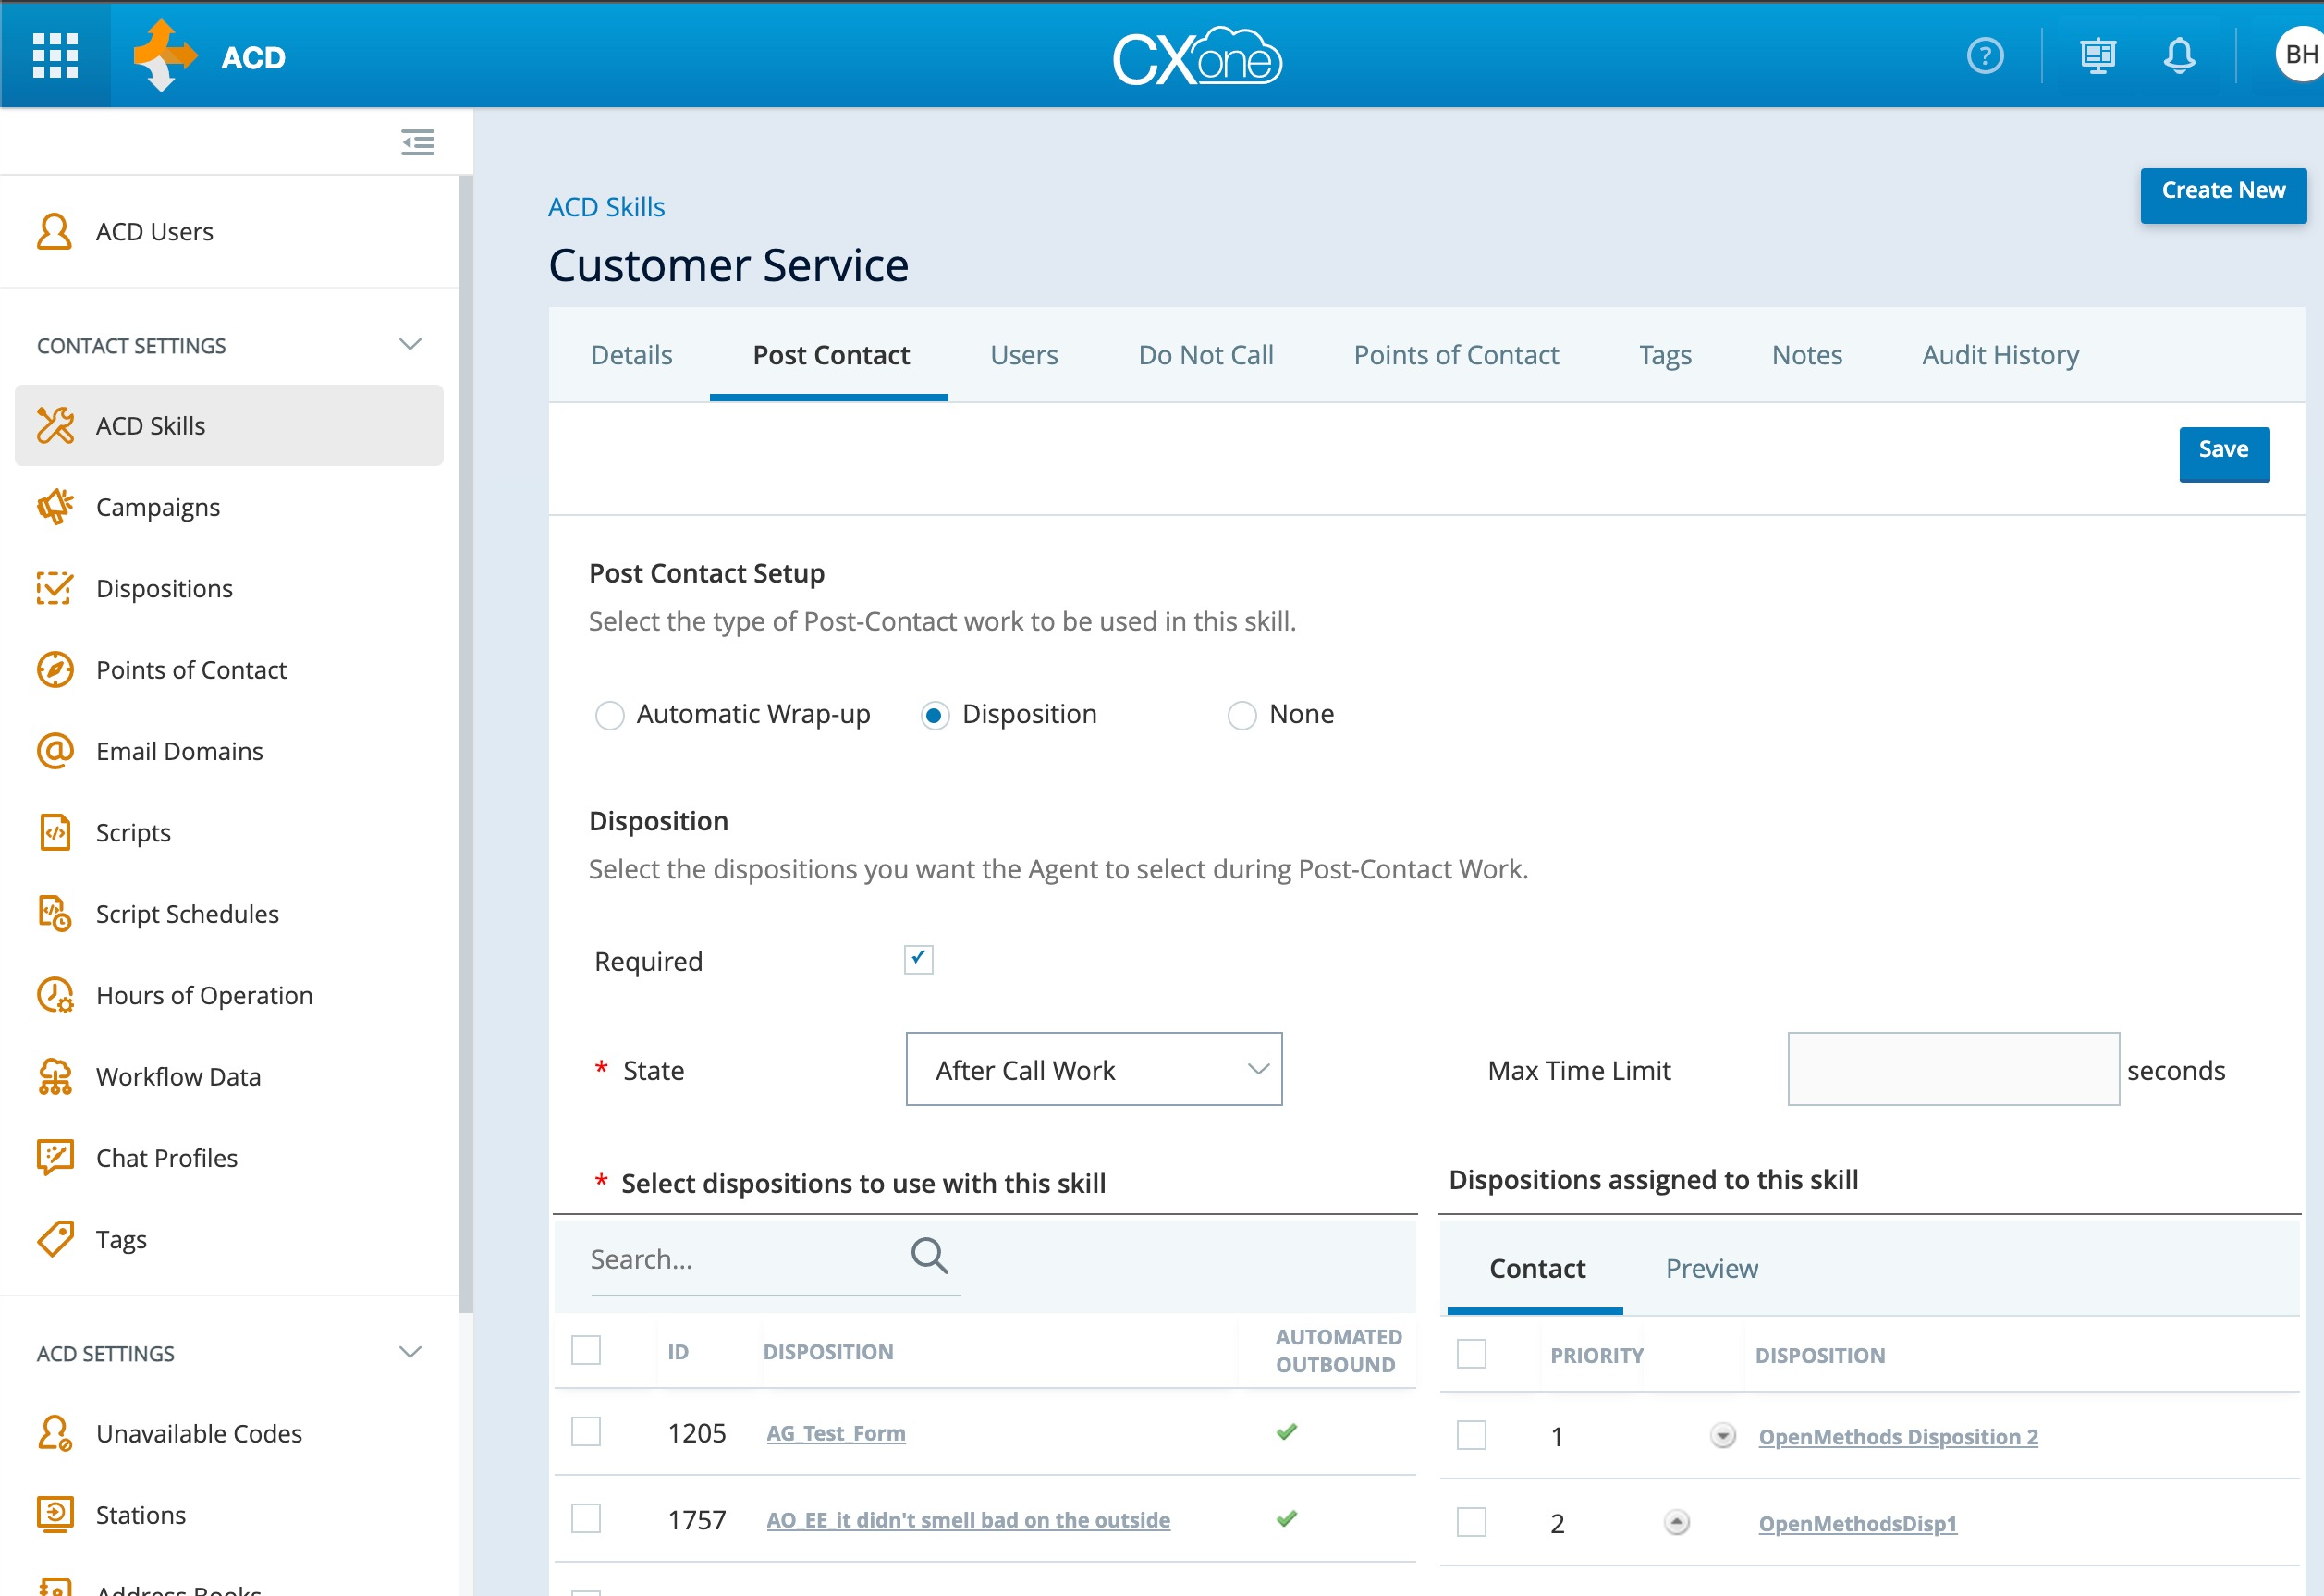
Disposition - Required
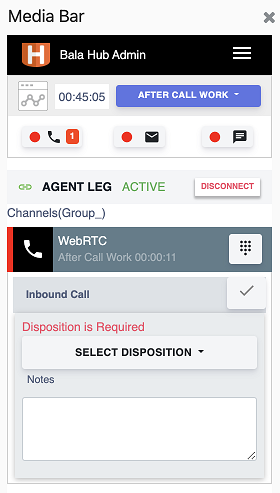 Disposition Required
- After the call is released ( hung up by either agent or caller), A green checkmark button will be shown, By clicking the button, Disposition drop-down box and a Notes text block will be displayed.
- Select a Disposition value and optionally enter the Notes and click the green checkmark button again to complete the Interaction.
- The green checkmark button will be disabled until selecting a disposition.
- Until a disposition is selected and click the green checkmark button, the Interaction will not be completed and agent status will be in ACW.
- After completing the Interaction, agent status will go Available.
- During ACW status, the agent may change his status to any Not Ready status, then after completing the Interaction, agent status will be put into the selected status.
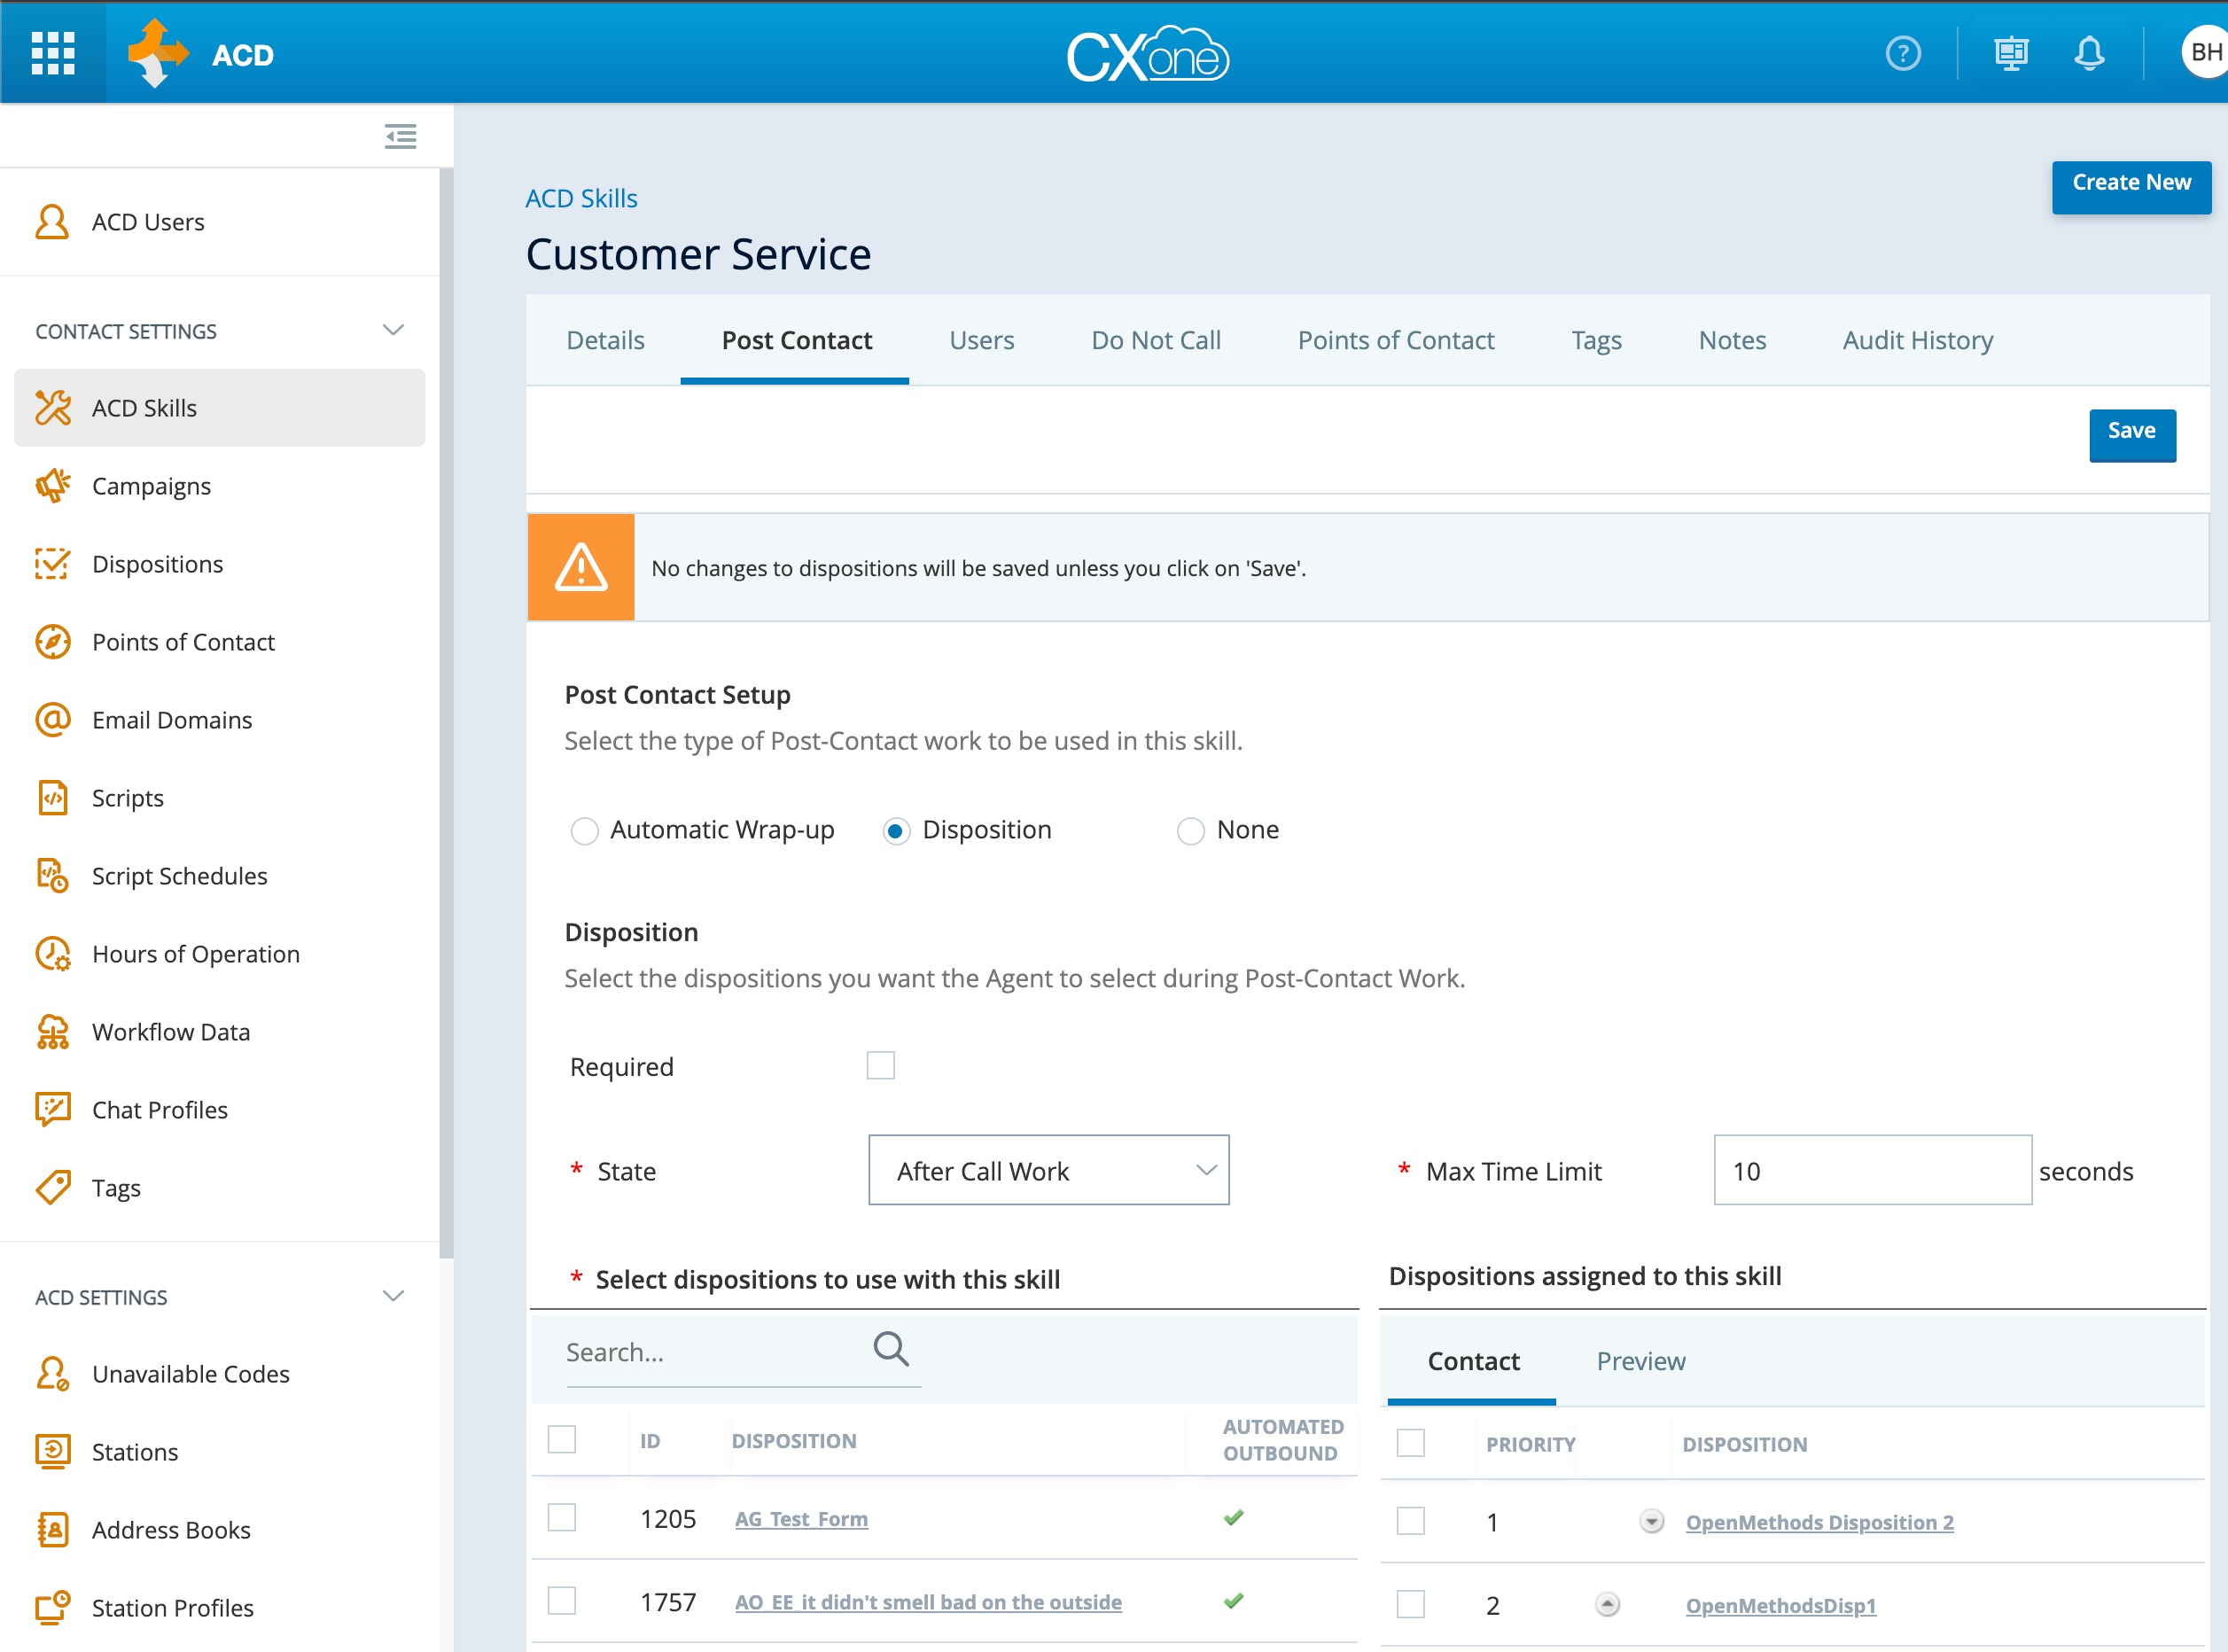
Disposition - Not Required
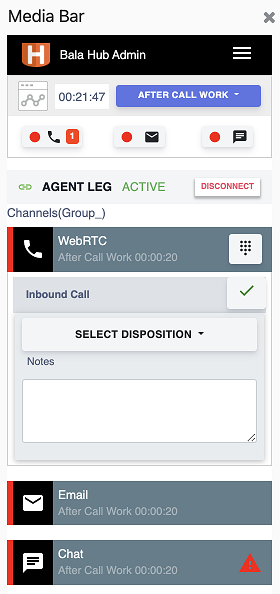 Disposition - Not Required
- After the call is released ( hung up by either agent or caller), A green checkmark button will be shown, By clicking the button, Disposition drop-down box and a Notes text block will be shown.
- Since the disposition is not required, the agent may select a disposition and/or click the green checkmark button again to complete the Interaction.
- The agent will be in an ACW state until the ACW timer ends.
- After the ACW max time limit ends, agent status will go Available automatically.
- Before the ACW timer ends, the agent may change his status to Available or any Not Ready reason, which terminates the ACW max time limit and the agent will be put into the selected status immediately.
- This helps if the agent wants to on Break or Lunch. Or does not want to wait for the whole ACW time and be ready to take the next Interaction.
Reminder for Disposition- After the call is released, the agent must click the green checkmark button to select the Disposition values and optionally enter the Notes.
- After selecting the Disposition ( if it is required), click the green checkmark button again to complete the Interaction.
